8-Strand End For End Splice
Class 2
Class 2 8-strand ropes are made in whole or in part from any of the following high modulus fibers: Dyneema®, Vectran®, Technora®, and PBO®.
Getting Started
Tools Required:
A splicing fid or
marlinspike, sharp knife or scissors, plastic or
masking tape, marking pen, light strong string.
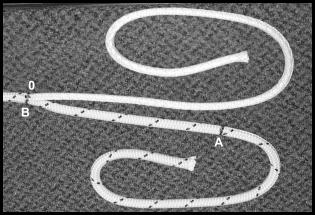
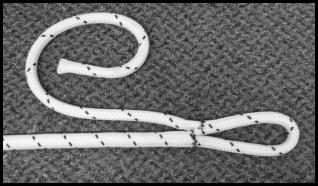
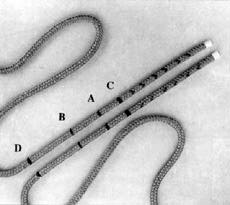
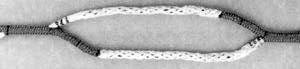
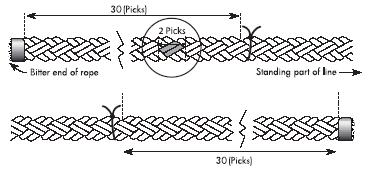
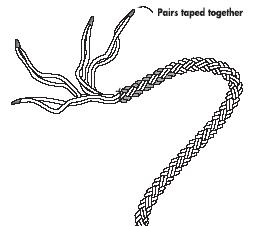
STEP 1 . . . Getting Started
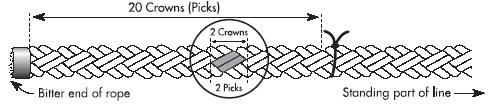
Lay ropes out and count 30 picks or
crowns from end of both ropes. Tie string or tape securely at these
points.
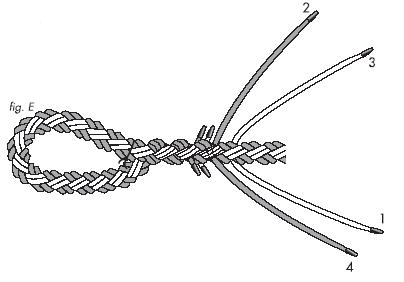
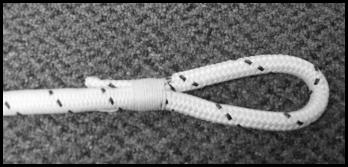
STEP 2 . . . Marking
Holding the end of the rope, note the
pairs of strands going to the left. Mark these pairs. Mark the strands up
to the string and continue to mark the strands for five (5) or more picks
beyond the strings.

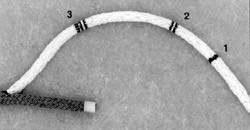
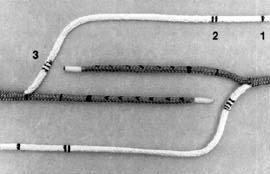
 STEP 3
. . . Separating & Taping
STEP 3
. . . Separating & Taping
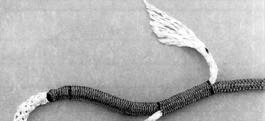
Remove tape from the end. Start unlaying
strands in their respective pairs. It is important to keep them together.
After they are separated into pairs up to the string, untwist the pairs.
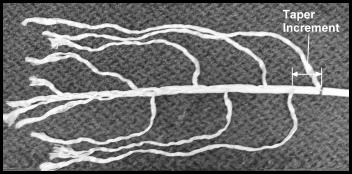
Tape the ends of the pairs together with a taper as shown.
Lay out ropes as shown.
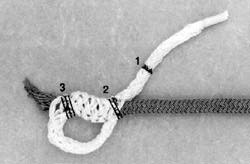
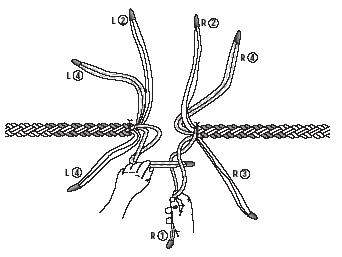
STEP 4
It is important that the nest steps of
the procedure be followed carefully.
Marked L {1} Strands go between
Marked R {1} Strands
Unmarked R {2} Strands go between Unmarked L {2} Strands
Unmarked L {3} Strands go between Unmarked R {3} Strands
Marked R {4} Strands go between Marked L {4} Strands
Unmarked R {2} Strands go between Unmarked L {2} Strands
Unmarked L {3} Strands go between Unmarked R {3} Strands
Marked R {4} Strands go between Marked L {4} Strands
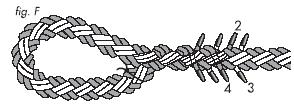
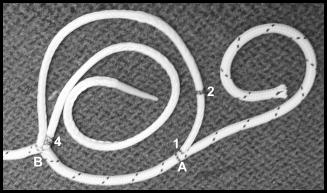
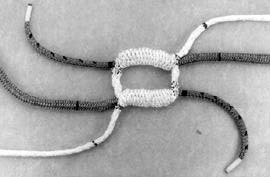
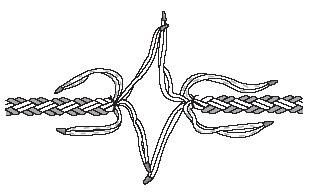
STEP 5
After the initial step has been
completed, you should have something that looks like the drawing below.
Marry the ropes as shown in Step 6. This part is preferably a
two-person job. Cut the string that you previously tied at the splicing
points of both ropes.

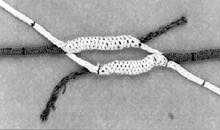
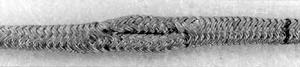
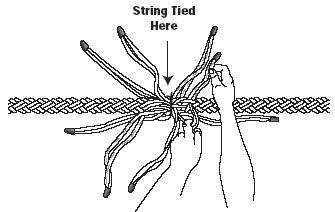
STEP 6
Keep the ropes together snuggly. Tie a
piece of string tightly around the splicing point as shown below.
Start your splice. A marked pair
under an unmarked pair of strands. Now you can follow the same
procedure as the eye splice. But we suggest that you complete one (1)
full tuck in one direction and then do a full tuck on the other side
of the marriage. Pull everything tight before proceeding.
STEP 7
Complete splicing in both directions so
that each side is finished off as per strand reduction sequence (steps
7-10) of the eye splice procedure.